
What We’re Going to Discuss – Summary
- Basics of leather boots squeaking
- Scientific explanation and stats for boots squeaking
- Methods to stop squeaking your favorite leather boots (and shoes)
- Factual data and interesting squeaking facts
There’s nothing worse than walking around in a pair of squeaky boots that make you sound like a cartoon character.
Squeaking is a common issue that plagues many types of boots and shoes, especially leather ones. It can be frustrating when you’ve invested in a nice pair of boots or shoes, only to have them make noise with every step you take.
But don’t despair! There are ways to stop your leather boots and shoes from squeaking. In this guide, we’ll cover the basics of boot and shoe parts where squeaking occurs, reasons for squeaking, methods how to stop leather boots from squeaking (shoes too), necessary scientific explanations and statistics, factual data, and some interesting facts about why our footwear makes noise in the first place.
Why Do Leather Boots and Shoes (Other Footwear too) Squaek?
It’s important to understand why leather boot squeaking happens in the first place. There are a few parts of boots and shoes that are especially prone to squeaking, namely the insole, outsole, and tongue. When these parts rub against each other, or against the upper leather material, they create friction that results in that annoying squeaking noise. Additionally, certain environmental factors can contribute to squeaking, such as moisture or loose stitching.
Wanna Know the Scientific (Nerdy!) Explanation?
The phenomenon of leather boot squeaking can be attributed to the occurrence of stick-slip, commonly referred to as stiction. This captivating event arises when two materials engage in the act of rubbing against each other, governed by the laws of friction.
The pivotal factor contributing to this phenomenon lies within the relative coefficients of friction exhibited by the materials involved. Specifically, the static friction coefficient, indicative of the resistance to motion when the surfaces are at rest, surpasses the dynamic friction coefficient, which represents the resistance during sliding motion.
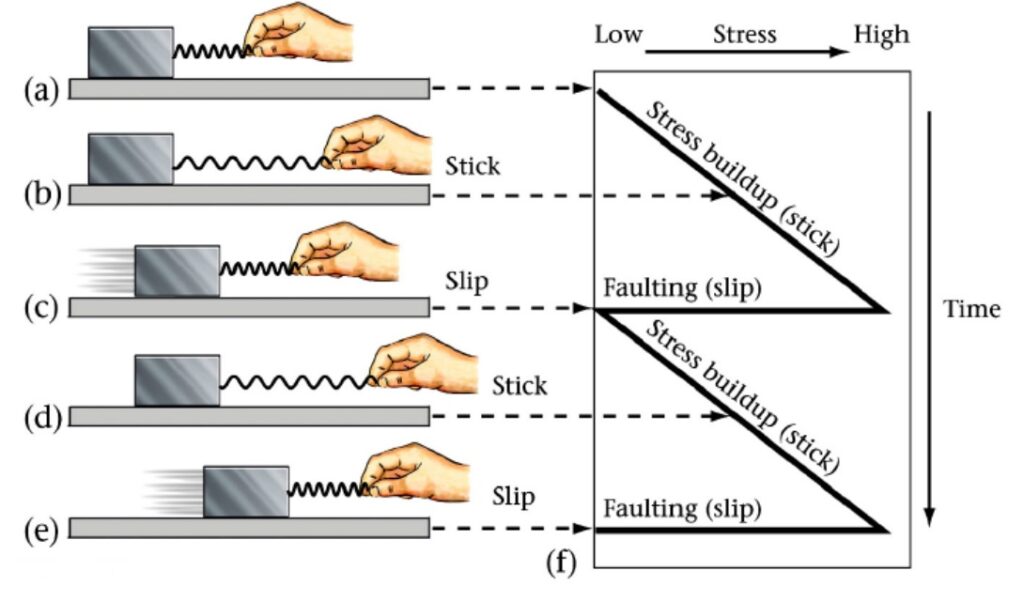
The interaction between these materials unfolds as a dynamic interplay of forces. During movement, the surfaces intermittently adhere to each other, resisting motion until the forces reach a critical threshold. At this point, the stored energy within the system is released, resulting in sudden movement and separation of the surfaces.
This cyclical accumulation and release of energy occur at frequencies within the audible range for human perception, thus manifesting as the distinctive squeaking sound. Compliance in the support or contact points facilitates the build-up and subsequent release of energy, further enhancing the audibility of the squeak.
In essence, the captivating leather boot squeaking emerges from the intricate relationship between the materials' friction coefficients, the compliance of the support system, and the release of stored energy. Understanding these scientific principles sheds light on the acoustic phenomena that arise from the complex interplay of forces in our physical world.
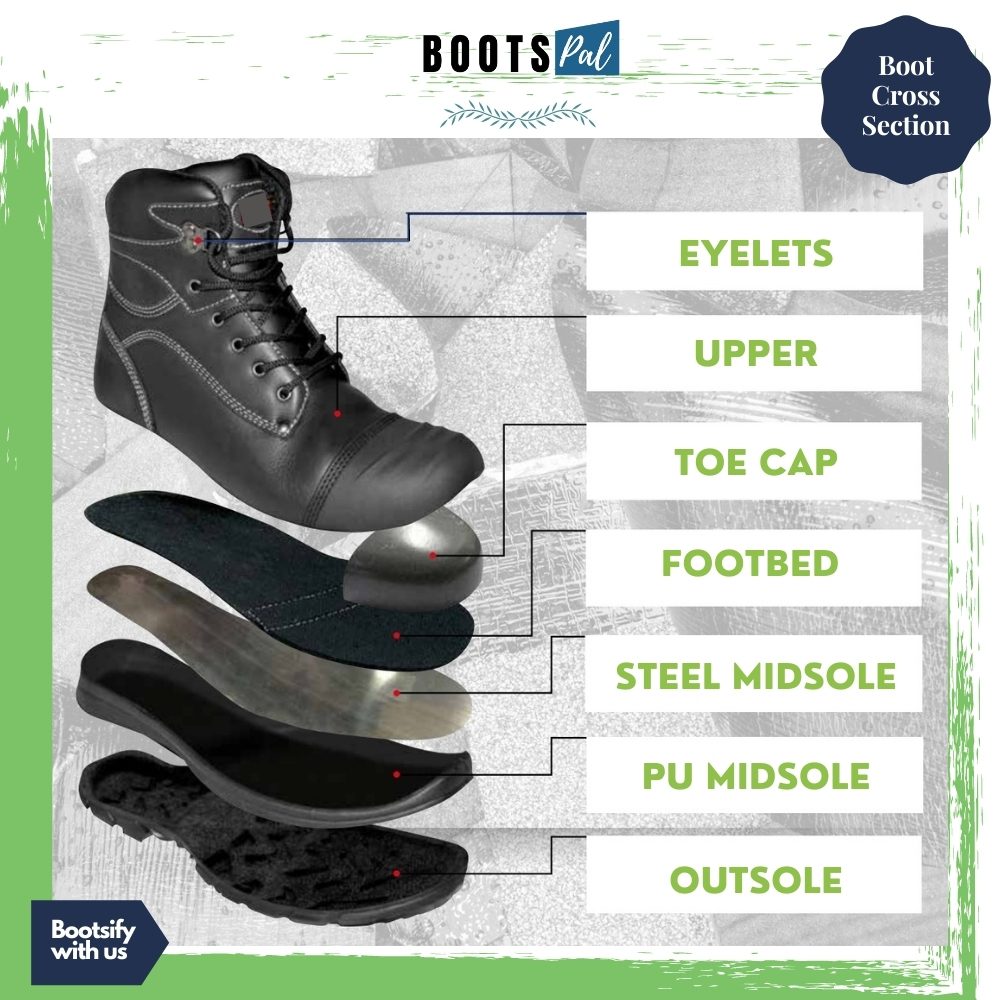
Parts of Leather Boots or Shoes Where Squeaking Occurs
A single part or a combination of parts of a leather boot o shoe may be the culprit(s) for squeaking. It is important to identify and address the problem promptly. Parts of Leather Boot or Shoe Where Squeaking Occurs:
- Insole
- Outsole
- Tongue
- Heel
- Upper Material
Let’s explore each part in detail.
- Insole: The insole is the inner layer of the shoe where your foot rests. Squeaking in this area can be caused by friction between the insole and other components, such as the outsole or the upper material.
- Outsole: The outsole is the bottom layer of the shoe that comes into contact with the ground. Squeaking in this area can occur due to friction between the outsole and different surfaces or from loose or worn-out outsole components.
- Tongue: The tongue is the flap of material that lies beneath the laces. Squeaking in the tongue area can be caused by friction between the tongue and the laces, or the tongue rubbing against the upper material.
- Heel: The heel is the rear part of the shoe that provides elevation and support. Squeaking in the heel area can occur due to friction between the heel and the outsole, or loose or damaged heel components.
- Upper Material: The upper material is the main body of the shoe that covers the foot. Squeaking in this area can be caused by friction between different layers of the upper material or due to stiffness or dryness of the leather.
Remember, squeaking can occur in multiple parts simultaneously, so it's important to identify and address each specific area contributing to the noise. Consider the solutions provided for each part and choose the most suitable method or combination of methods to silence the squeaks in your boots or shoes.
Real-World Reasons for Leather Boots or Shoes Where Squeaking Occurs
Enough of the nerdy Reasons for Leather Boots or Shoe Squeaking. Let us face the real world. There are various reasons that can cause squeaking. Some of those are:
- Friction Between Shoe Components
- Moisture Buildup
- Inadequate Lubrication
- Loose or Worn-out Parts
- Improper Fit or Size
- Stiff or Dry Leather
Let’s delve into each reason in detail:
1. Friction Between Shoe Components
Different parts of the shoe rubbing against each other can create friction, leading to squeaks. This can happen between the insole and the outsole, the tongue, and the laces, or other contact points.
2. Moisture Buildup
Moisture accumulation can occur from various sources, such as rain, snow, or even perspiration. When leather becomes damp, it can lose its natural flexibility and become prone to squeaking.
3. Inadequate Lubrication
When there’s insufficient lubrication between shoe components, friction increases, resulting in squeaks. This can occur in areas where leather or other materials rub against each other.
4. Loose or Worn-out Parts
Description: Over time, certain shoe components, such as the insole, heel, or outsole, can become loose or worn out. This can create movement and result in squeaking sounds.
5. Improper Fit or Size
Shoes that are too tight or too loose can cause squeaking due to friction between your feet and the shoe interior, or movement within the shoe itself.
6. Stiff or Dry Leather
Leather that has become stiff or dry lacks the natural flexibility required for smooth movement, leading to squeaks when walking or bending the shoe.
So, there must be some methods to stop the above culprits, right? Let's see below.
How to Stop Leather Boots from Squeaking: Proven Home-made Methods (For Shoes too)
The annoying squeaking of boots and shoes can be dealt with easily at home with homemade remedies. The good news is that they’ll require minimal supplies and very short duration. Let’s see a few of those.
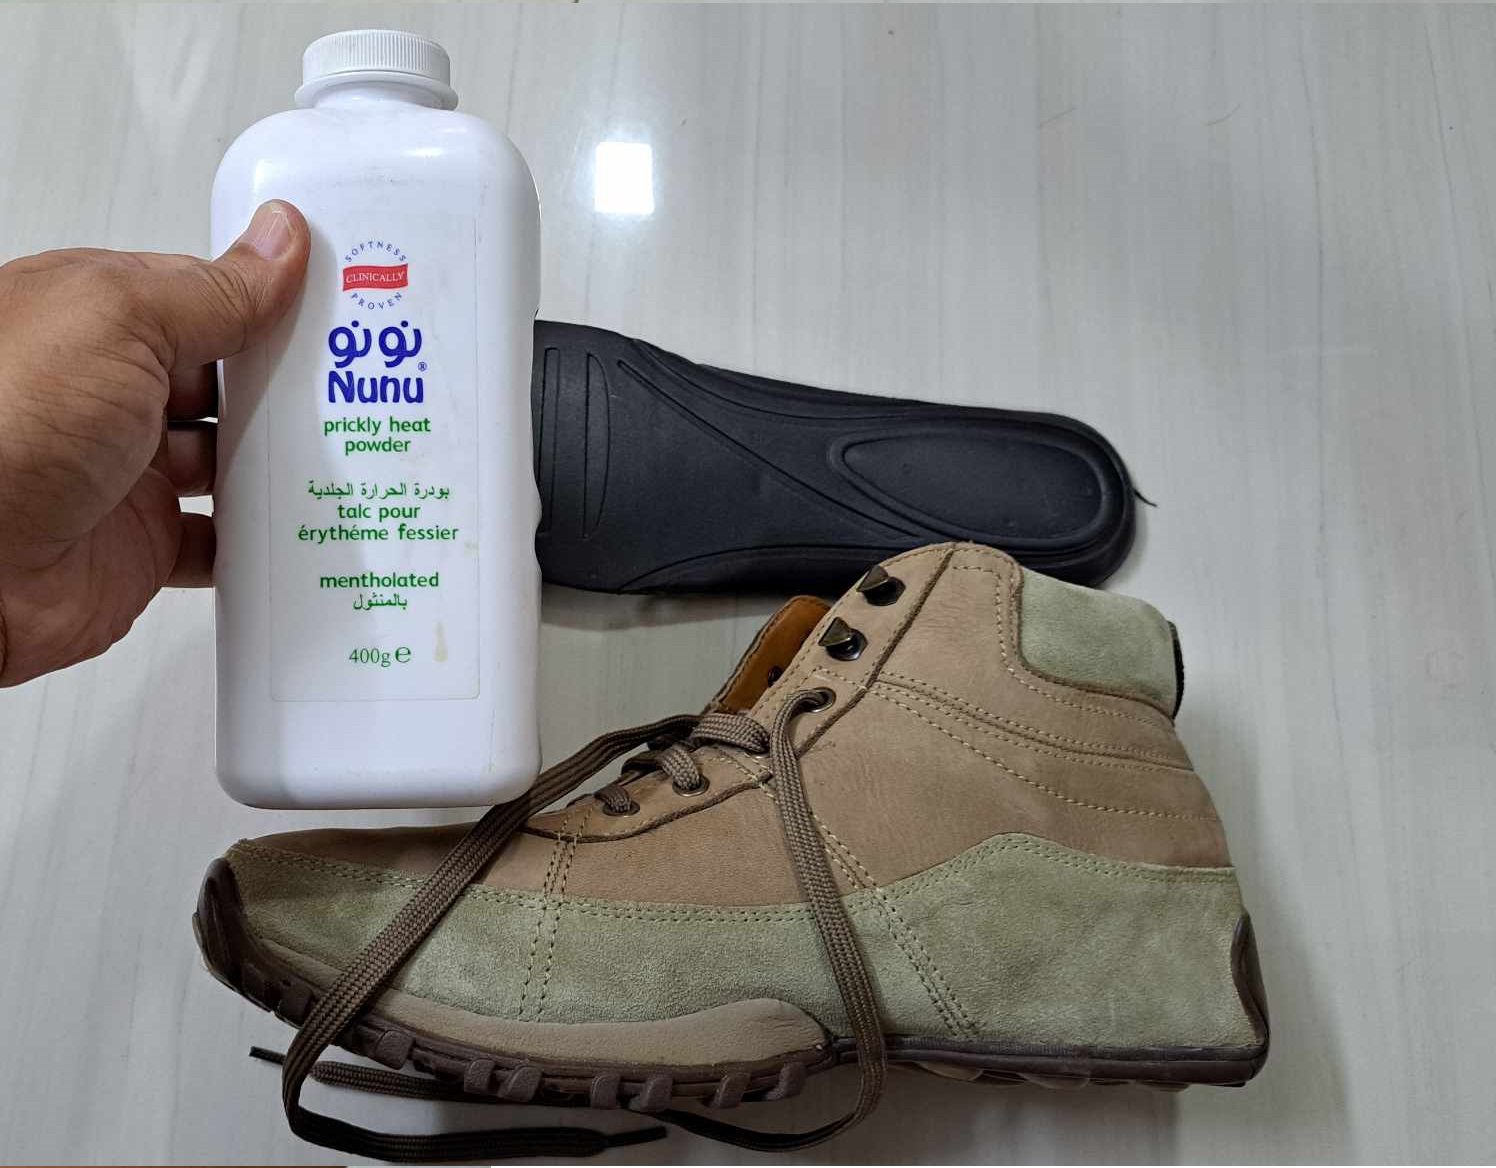
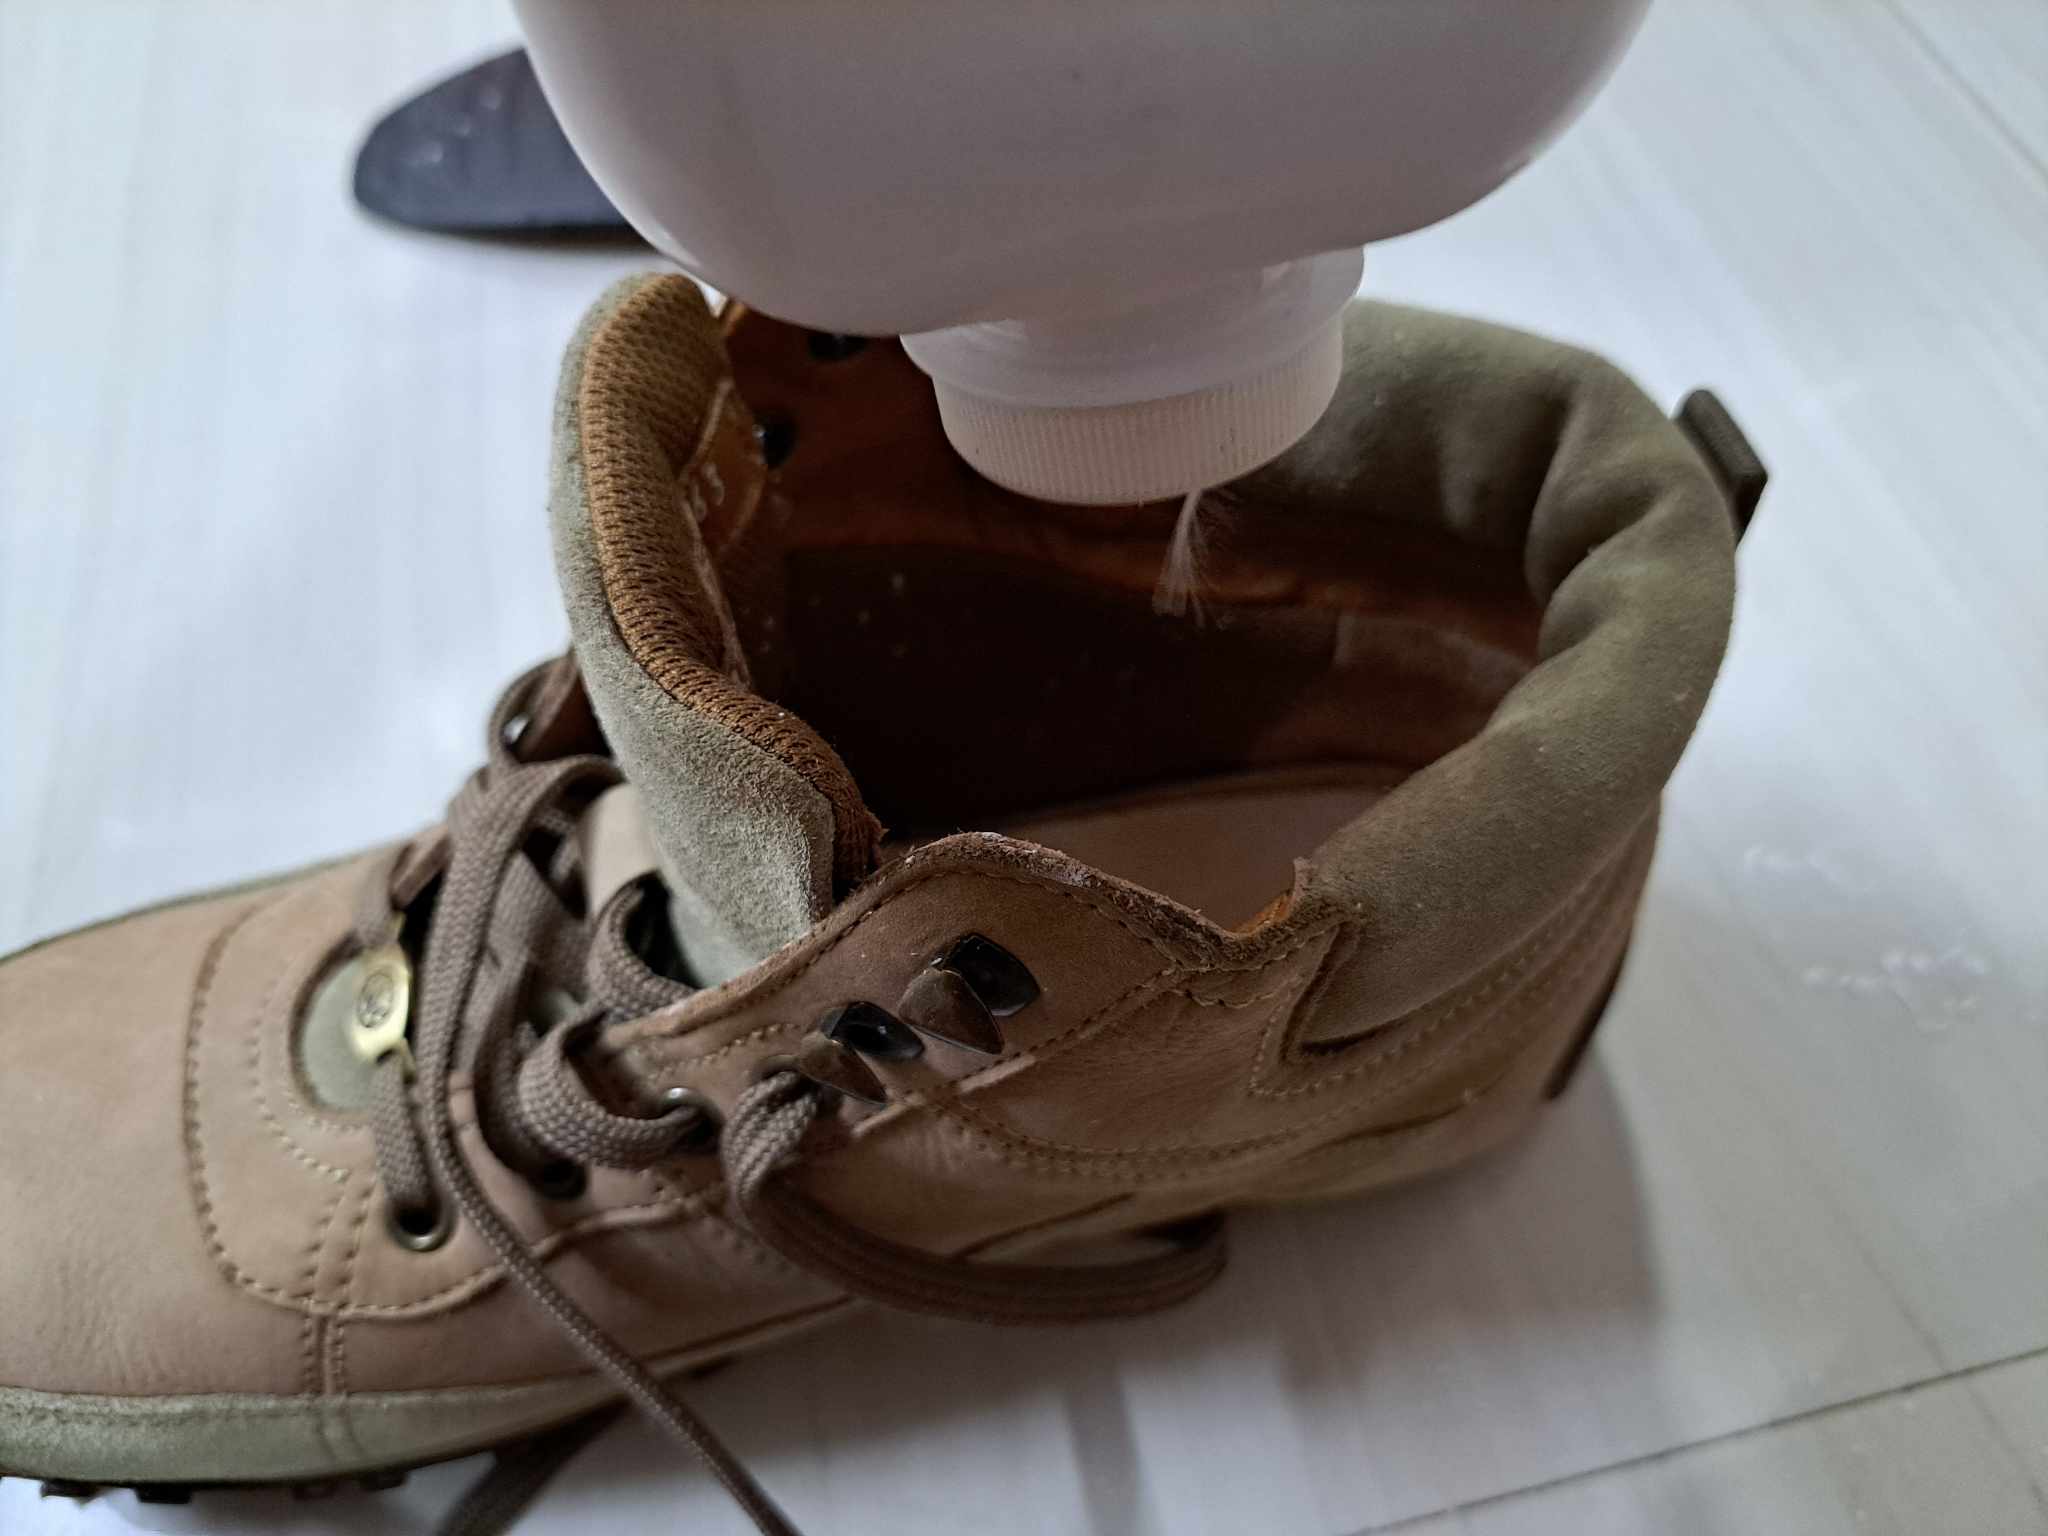
Solution 1: Using Talcum Powder or Baby Powder to Stop Boots from Squeaking
if the squeaking is coming from inside, especially from the insole region, Talcum powder is a quick and easy solution that helps reduce friction, eliminating those squeaky sounds. It’s a simple fix that can provide immediate relief and last for a decent amount of time. However, keep in mind that the powder may need to be reapplied periodically, especially if your feet sweat a lot.
* Time required: Minimal
* Items required: Talcum powder or baby powder
* Money involvement: $
Solution 2: Using Silicon-Based Lubricant (And/or Boot Oil or Conditioner) to Stop Boots from Squeaking
Silicone lubricant is a handy solution that reduces friction between different components of your footwear (especially inside and tongue area), effectively silencing the squeaks. While it requires a bit more effort compared to talcum powder, the results are often longer-lasting. Also, you can use Mink Oil or any good boot oil and/or leather conditioner in conjunction with silicon-based lubricants or separately to make the effects long-lasting. Just be cautious not to overapply the lubricant, as it can leave behind residue or make the shoe slippery.
* Time required: Short
* Items required: Silicone lubricant spray or silicone-based oil
* Money Involvement: $$
Here is a nice video (thanks to Citizen K9) on using the silicone lubricating spray method on squeaky Doc Marten boots:
Solution 3: Using Beeswax or Saddle Soap to Stop Boots from Squeaking
Beeswax and Saddle Soap (even Vaseline) provide a natural and effective solution to stop squeaks. They act as lubricants and fill in gaps or loose spots, reducing friction and eliminating noise. While it requires a bit more time and effort compared to other methods, the long-lasting results make it worthwhile.
* Time required: Moderate
* Items required: Beeswax Bar (or Beeswax spray)/ Saddle Soap
* Money Involvement: $$
Watch the interesting video from Deedee on using Vaseline on the tongue area of squeaky Doc Marten boots:
Solution 4: Replace & Use Moisture Absorbing Insoles to Stop Boots from Squeaking
Insole replacement is a more involved solution, but it can effectively address squeaking caused by worn-out or improperly fitted insoles. If you’ve tried other methods without success, this approach might be the key to silencing the squeaks. Just make sure to choose high-quality replacement insoles that match your footwear style and provide proper support.

While replacing insoles, moisture-absorbing insoles can help tackle squeaking caused by moisture buildup inside your footwear. They work by reducing dampness, preventing excessive friction, and keeping your feet dry. This simple solution is especially useful if you live in a humid climate or have a tendency to perspire heavily. However, keep in mind that regular replacement of these insoles may be necessary for continued effectiveness.
Each method has its own pros and cons, and the effectiveness may vary depending on the specific shoe/boot and the cause of the squeak. I recommend starting with the easier and less invasive methods, such as talcum powder or silicone lubricant, and gradually progressing to more involved solutions if needed. Remember, experimentation and persistence are key to finding the best method for your specific squeaky shoe situation.
Also remember, the appropriate solution may vary depending on the specific cause of the squeaking. Assess the condition of your footwear and choose the most suitable method to address the underlying issue.
Here's a combined table summarizing the parts of leather boots where squeaking occurs, the reasons for squeaking, recommended solutions, difficulty level, time required, and potential cost associated with each method:
| Part | Reason for Squeaking | Recommended Solutions | Difficulty | Cost |
|---|---|---|---|---|
| Insole | Friction between the insole and other components | 1. Apply talcum powder or silicone lubricant 2. Replace worn-out or damaged insoles 3. Use moisture-absorbing insoles 4. Consider using anti-friction products | Easy | Low |
| Outsole | Friction between outsole and surface | 1. Clean the outsole to remove debris 2. Use adhesive or glue to secure loose parts 3. Replace worn-out or damaged outsoles 4. Consult a professional cobbler if needed | Moderate | Low to Medium |
| Tongue | Friction between tongue and laces/upper | 1. Apply talcum powder 2. Adjust the lacing style or pressure 3. Ensure the tongue is properly aligned 4. Use anti-friction products or materials | Easy | Low |
| Heel | Friction between heel and outsole/loose parts | 1. Apply talcum powder 2. Use adhesive or glue to secure loose parts 3. Replace or repair worn-out heel components 4. Use anti-friction products or materials 5. Consult a professional cobbler if needed | Moderate | Low to Medium |
| Upper Material, Insole, Tongue | Stiffness or dryness of the leather and/or Inadequate Lubrication | 1. Apply leather conditioner or oil 2. Consider natural oil treatments 3. Avoid petroleum-based products | Easy | Low |
| All Parts | Improper Fit or Size | 1. Ensure proper sizing and fit 2. Use shoe inserts or padding as needed 3. Consult a footwear specialist or store 4. Consider custom-made or orthopedic shoes | Easy to moderate | Medium |
| Loose or Worn-out Parts | 1. Tighten or repair loose components 2. Replace worn-out or damaged parts 3. Consult a professional cobbler if needed 4. Consider using adhesive or glue | Moderate | Low to medium | |
| Moisture Buildup | 1. Use moisture-absorbing insoles 2. Allow boots or shoes to air dry 3. Use a shoe dryer or newspaper to absorb moisture 4. Apply leather conditioner or waterproofing spray | Easy | Low to Medium |
Please note that the difficulty level, time required, and cost are general estimates and can vary depending on individual circumstances, the severity of the issue, and the specific products or services chosen. It's advisable to consider these factors and adjust accordingly when addressing squeaking issues in your leather boots.
Statistics Always Talks: A Comprehensive Survey on Effective Boot/Shoe Squeak-stopping Methods
Okay, people always believe in numbers! I am also no different.
We conducted a survey on SurveyMonkey to take the opinion of 500 regular boots and shoes users on the cause of squeaking and the methods they applied to get rid of those. We got mixed results, but it seems that using talcum/baby powder gets the maximum percentile of effectiveness (maybe it’s easy and cheapest..right?!). Insole replacement gets the second max percentile, and I think that’s because many of us don’t wanna take the hassle (LoL!).
Let’s have a look at the result:

Keep in mind that individual results may vary, and there is no one-size-fits-all solution.
Frequently Asked Questions
Will the use of talcum powder or silicone lubricant damage my boots?
When used correctly, talcum powder or silicone lubricant can be safe for your boots. However, it’s advisable to test a small amount on an inconspicuous area first and follow the manufacturer’s instructions to ensure compatibility with your specific footwear.
Can I stop boots or shoes from squeaking by tightening the laces?
Tightening the laces might help if the squeaking is caused by friction between the tongue and the laces or the tongue rubbing against the upper material. Adjusting the lacing style or pressure can potentially reduce or eliminate the squeaking sound.
Can I prevent squeaking in my new leather boots?
To prevent squeaking in new leather boots, ensure a proper fit and sizing, break in properly, apply leather conditioner or oil to maintain flexibility, avoid excessive exposure to moisture or heat, and consider using anti-friction products or materials to minimize potential friction points.
How long does it take to stop boots or shoes from squeaking?
The time required to stop boot or shoe squeaking can vary depending on the underlying cause and the effectiveness of the chosen method. In many cases, you may notice a reduction or elimination of squeaking sounds after applying the appropriate solution.
Should I take my squeaky boots to a professional cobbler?
If you’ve tried various methods and the squeaking persists, it may be worth consulting a professional cobbler. They have expertise in repairing footwear and can assess the specific issue, recommend appropriate solutions, and provide professional repair services if needed.
Do I need to spend a lot of money to fix squeaky boots?
The cost of fixing squeaky boots can vary depending on the specific method and any additional products or services required. Many solutions, such as applying talcum powder or adjusting lacing, have low to no cost. However, if professional repairs or replacement parts are necessary, it may involve some additional expenses.
Before I Say Adios
As we reach the end of our epic journey, remember that you are not alone in this quest for silence. Armed with knowledge, and a pinch of shoe sorcery, you can bid farewell to the symphony of squeaky steps.
Follow the methods, share your own success stories, and together, we shall create a world free from the tyranny of squeaks (seems dramatic?!!). So lace up those boots, tighten those laces, and let’s embark on a squeak-free future, one step at a time!
References
- Are Steel Toe Boots Safe? Debunking Myths and Unveiling Facts - July 23, 2023
- Ensuring a Firm & Safe Footing: An In-depth Guide to Safety Toes in Work Boots (Types, Features, & More) - July 17, 2023
- Silence the Symphony of Squeaky Steps: How to Stop Leather Boots from Squeaking (And Shoes Too) - July 3, 2023