
Sometimes a pair of boots may not just another pair of footwear to you. The pair may become old and weary, soles may have become worn out. But they may be carrying some memories, or they might have been gifted my someone dear, or you may just continue to use that as you really like the cool design or vivid color!
If you are under such dilemma, resoling boots maybe the best feasible option to you.
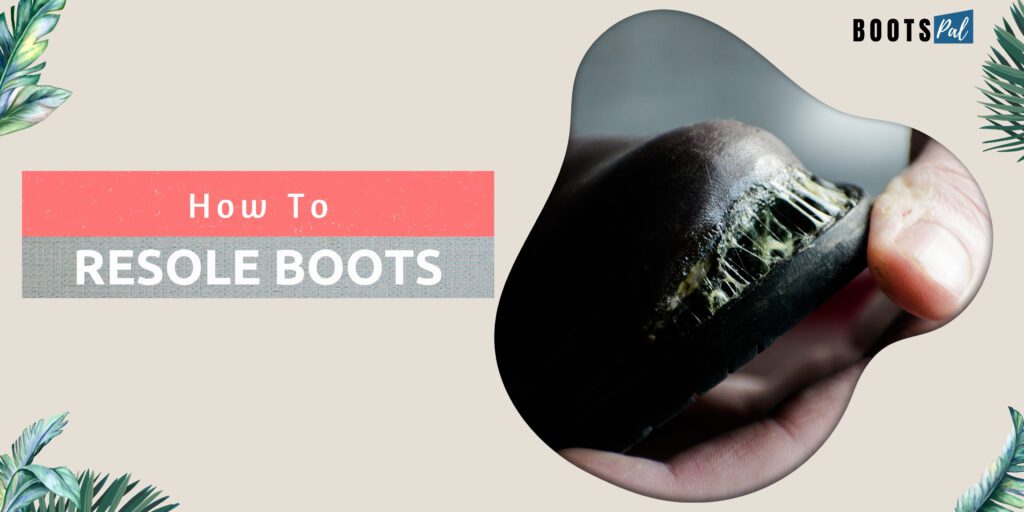
Resoling is an inexpensive way to extend the life of your favorite boots or shoes and give them an entirely new look! It’s also pretty easy to do yourself, even at home; all you need is some basic tools and a bit of know-how.
Boots/Shoes resoling, also known as re-heeling or relasting, is the process of temporarily removing the outsole and trimming away excess material to make room for a new sole. This is not permanent and can be done to almost any type of shoe with an outsole (which includes work boots). The final product looks like a brand new pair, without the high price!
The purpose of resoling is to protect your footwear investment and extend its life. The benefit of this process is that it’s inexpensive, quick, and can easily be done at home. This makes it a great option for anyone who wants to keep wearing their boots until they fall apart!
If you’re tired of rapid outsole wear, resoling is the way to go.
Can All Boots be Resoled?
Boots Than Can be Resoled
Boots constructed using Goodyear welts which contain rows of visible stitching around the sole are great for releasing the sole and can easily be resoled. The odds of these shoes being glued are much higher on cheaper models so don’t expect too much from them. If you buy cheap shoes you could think about insulation and a resoling however if you buy them you could get lint. Other resole-friendly stitching of boots includes :
- Blake Stitch/McKay
- Blake rapid
- Stitch-down
- Hand Welted
- Norvegese/Storm Welt Construction
- Bologna Construction
- Veldtschoen
- San Crispino

Image Courtesy : bespokeunit
Boots That Can’t be Resoled
All kinds of shoes/boots that have less or no stitching on the welt, such as those with a leather strip on top and stitched down to the sole can’t be resoled. These shoes are glued together and resealing the seam is too difficult. Some shoes that have to be sewn together and stitched down to the sole cannot be resoled.
Pro Tip : The best way you can tell is by looking at the bottom of your shoes and seeing if there is stitching around the sole.
10 Signs to Identify the Right Time to Get Boots Resoled

You should resole your working boots as soon as these cause problems. Even the small crack between the heel and upper half of the boot affects your safety and must be urgently taken into account. How long you can wait until you need to replace a pair with another to keep these boots in use would depend completely on the make and the type of wear you subject them to. But keep an eye on the following Warning signs that your boots need to be resoled :
- If the upper has started to detach from the midsole – the boots need to be resoled.
- A crack at the bottom of the shoe/boot.
- An uneven sole in your boot may be a sign that your shoes are prone to slipping and you can lose the ability to use them easily.
- Damage caused by water moisture or heat can be an immediate problem for a person on their foot. Your rubber soles can remain intact through your leather soles are vulnerable to water.
- When the leather starts to wear on your feet take this as a sign you don’t want to avoid otherwise your next step is a hole inside your sole which could be a serious bummer.
- When the sidewalk just feels closer to your feet then just move on.
- If water is entering your shoes that will mean you don’t protect your shoes.
- If the ground suddenly feels closer to feet there are indicators that the leather is thinning and the boots don’t feel very comfortable.
- You slip and slide inside your boots when walking up or downstairs or on an inclined sidewalk.
- In extreme cases – there is a chance for serious injury as a result of your safety boots failing to function as expected.
Is It Worthy to Resole Your Boots?
Getting your footwear resoled can sometimes seem too overwhelming. You may be worried about the costs or if it takes too long. To help you determine whether this is better for you please check some of the factors to consider. In special cases, you may need a specialized shoe repair shop or service to perform some of the services you need in order to get this done.
Factor-1 : Cost of Boot Resoling
At first, ask the question - how much does it cost to resole boots?
After you have determined the requirement of resoling your boots, here comes the expense phase. Cost of resoling, minor or major, depends on various things starting from type and quality of boot, type and grade of damage, expert assistance required or not, etc. A minor sole repair may cost you under $10 where you can simply use glue or a patch. But in some cases, the damage might be so severe that resoling with a pair of new soles become inevitable.
- A minor sole repair task should be costing within the range of $10-$20.
- A medium-degree damaged sole replacement task at home with DIY method should cost you around $30-$100 including the new sole and DIY sole repair kit.
- A severely damaged sole replacement that requires an expert intervention may cost you around $75-$150 and requires some time to be repaired and delivered to you.
Pro Tip : A suburb or small city cobbler is likely to charge far less than a big city or downtown shoe repair shop.
Factor-2 : The Time Involved
Now, ask the question - how much time required to resole your boots?
The process of replacing your boots often takes longer and costs more. Sending them by mail to another repair company may take another amount of time. Even if you take them into a neighborhood cobbler shop it can take you days to get to the shoe.
The majority of processes take at least 2-3 weeks. It will take a while to find a good cobbler to get your boots into the business.
Factor-3 : Resole at Home or at Shop
Question - Can I resole the boots at home? Or do I need to go to a cobbler?
You will probably have multiple possibilities on where you could have your boots resoled. Depending on the nature and degree of damage, you can always resole at home by DIY method which will drastically decrease the cost and time required, but will increase your fatigue.
On the other hand, If there’s a cobbler or a repair shop in your area you may bring your boots there if they offer cheaper price or the degree of damage makes it difficult to DIY at home. This will, possibly, increase your cost and wait time to get the resole job done.
There may be a possibility that the degree or nature of damage of your boot soles may require a replacement of the pair of boots due to non-feasibility of resoling over replacement by a new pair.
Pro Tip: Some Boot Company will offer to re-make their own boots, so it might be worth checking this before you make any decision.
Step-by-step Guide How To Resole Boots at Home
Resole Your Work Boots Yourself!
If you’re wondering how to resole work boots yourself, the process is pretty simple. All it takes is a few basic tools and some patience. It’s also possible to have your boot re-soled by a professional cobbler if you are short on time or don’t have the tools needed to do it yourself. It will cost a bit more, but is well worth it if you need your boots back quickly!
Supplies Needed:
- Stitches (for stitching the new outsole)
- Punch
- Hammer
- Knife/Utility blade
- Tin snips (optional)
- Safety gloves
- Sandpaper, medium grain
- Shoe stretcher (optional)
- A hand or electric drill (optional)
- Nails (various sizes)
- Sandpaper (100, 150, 220 grit for finishing)
- Stitch cutter (if you choose to include a speed bump)
- Awl (optional)
- Screwdriver (optional)
- Glue
- Contact Cement
Instructions:
Step-1 : Remove The Old Outsole
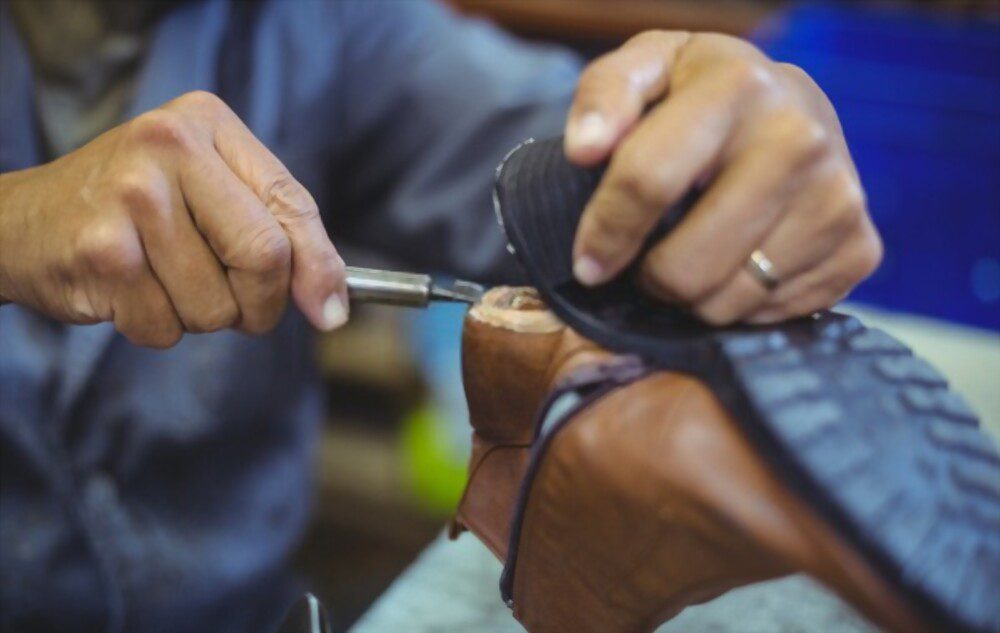
- Once you’ve gathered your tools, it’s time to get started. Set aside an hour of free time, some water, and snacks to keep yourself hydrated and refreshed, and prepare for action!
- The first step is to remove the old sole. You may need to use a sharp blade or knife, or even a screwdriver to cut through the stitching under your heel, but after that you should be able to pry them right off with your hands. If you’re having trouble, just apply some force and pop one side of the sole off.
- You can also use pliers/pincers/stomp if you need more leverage when cutting through tough material like leather or rubber. You can also favor using a hammer and nail punch when cutting the material to keep blades sharp and avoid injury and try not to damage your boots in the process!
- Once you have all of your soles off, take a look at both sides of each boot. There will be three layers from top-to-bottom: the outer most leather or suede, the mid sole and sock liner, and the inner most outsole.
- You’ll want to remove all of these layers so that you can start fresh with your new soles. You can cut through them with a stitch cutter easily enough, but for leather shoes it’s best to just peel back as much of the upper as possible and use your drill to remove the soles.
- For doing this, it is helpful to use one of the smaller nails to get your hole started. After that just apply pressure and twist until you can pry them out with a screwdriver or some pliers.
WARNING: This may damage any rubber midsole, so be very careful while cutting! If you are unsure about what parts of your boot are rubber vs leather, make sure you make a diagram or take pictures before beginning. Once the stitching is cut around the perimeter of your outsole (heel, toe, and vamp), you should be able to lift your outsole off the midsole. Set it aside; you can deal with that later!
Step-2 : Trimming Midsole

- Now that your old sole is removed, take a look at the bottom of your boot where the newly exposed midsole will accept our new outsole.
- You will see that it has worn away to almost nothing in some places! This is the part of the boot that you are going to need to trim down to attach your new outsole. Use a knife or utility blade to measure and mark how much material needs to be removed.
- The goal is just to have enough space for the new sole, so err on the side of cutting off too much rather than too little. Just be careful not to cut your boots up! Once you have marked how much will need to be trimmed, use a pair of tin snips to remove the excess material.
Step-3 : Trimming Outsole

- Once your midsole has been leveled to accept your new outsole, it’s time to attach the new sole! If you have a shoe stretcher, that’s helpful for making things go quicker. You can also use a hammer and punch to stretch your outsole if needed.
- When attaching your new outsole to the midsole of your boots, make sure you face the direction of tread of the soles in the same direction! This will help you get the most life out of your new soles.
- Make sure that each side of tread pattern on your new soles meet at the top of the boot (where stitching normally takes place). This is what holds your boots together, and is how they were re-soled at the factory originally.
- It may be helpful to tape the area where your new soles will meet before beginning so you don’t glue it shut by mistake! Now, simply follow the instructions of your contact cement (water-based works best for this) and use that to apply a thin layer on both surfaces.
- You may want some newspaper or cardboard under the boots while you wait for the cement to dry a bit.
- Once both surfaces are well-coated, place them together and make sure everything is good to go before you put any weight on the boot.
- If you have a shoe stretcher, now is a great time to use it!
Step-4 : Finishing New Soles
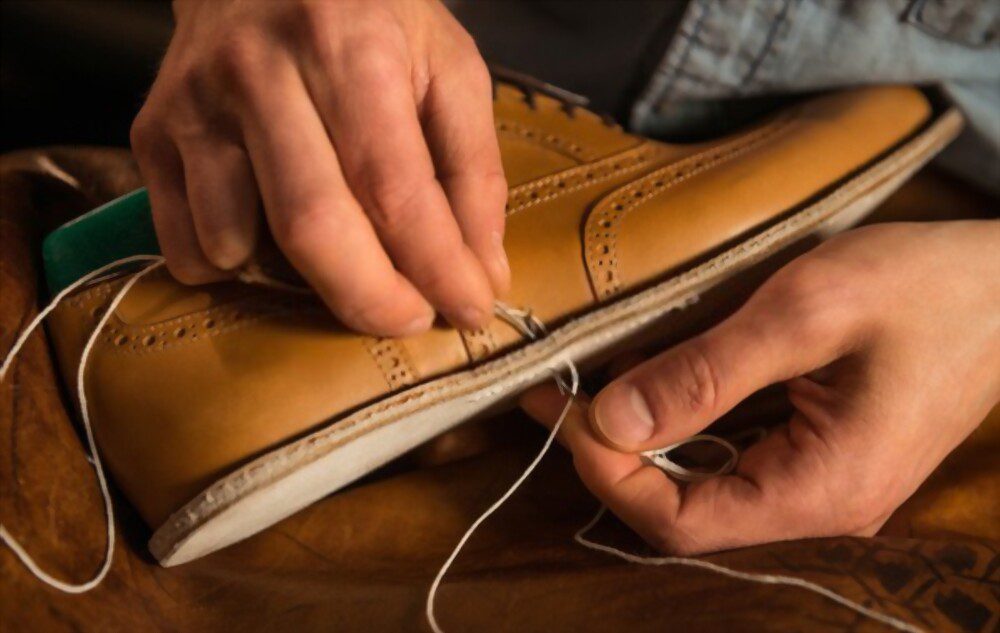
- Once your new soles have dried enough to hold their shape, you’ll want to start stiching them down. Remember earlier when we removed the stitching from our old outsole? This is why that was important! You will need the stitching holes on your new outsole to keep it attached to your midsole. They provide a solid point of connection between both layers.
- The first step is to choose a sturdy thread. If you have super glue, you’ll want to use that on each hole before stitching to make sure your boot stays together! This makes it easier if you plan on using a heavy duty needle (like a leather or carpet needle).
- Using extra-strong thread from the start will help reduce the number of times you need to apply the superglue. You’ll want about a foot or so of thread for each hole you will be stitching through.
- Tie a knot in one end and keep it there until you complete your whole boot, then make a knot on the other side once finished. This helps prevent any loss of thread during use.
- Begin by using wax paper or a plastic grocery bag to cover the inside of your boot. Pull the thread up from one stitch hole on the outside of your midsole and push it through from the opposite stitch hole on the outsole.
- Bring it back down through the opposite stitch hole in your midsole so you have both ends facing in opposite directions, then tie a knot on each piece of thread so they won’t pull back through.
- Repeat this step until you have about an inch and a half of thread between the two layers and cut off any excess.
- Now, simply take your needle or leather punch and whipstitch the two pieces together, making sure to go through both layers of material for extra strength.
- Once you have made your way around the boot, tie off your thread on both sides (leaving an extra two inches of length to make sure you can get it through) and use superglue to cover each hole.
- Allow this to dry for about an hour before wearing!
So there you have it!
If you follow these steps carefully, you should have a boot that is in better condition than when you started. It's no longer just a shoe - it's an entirely new boot! The glue may still be drying, but why not take this opportunity to clean up your boots? You might even want to try some leather cream with beeswax to give them an extra layer of protection! Whatever the case, you should have yourself a pair of boots that are ready to take on any challenge.
Half Sole repair Vs Full Sole Repair/Resole: What is the Difference and Which Should You Choose?
- The difference between half sole repair and a full sole repair is simply the amount of removal of bad sole material.
- A half-sole repair is quick, cheap, and ideal for the guy who likes to wear his boots hard. The guy who doesn’t care if they last a few months but prefers to change them up every now and again.
- It’s also great for boots that are too far gone, either due to over-wear or those that have been repaired before and now need to be re-done properly.
- A full sole repair is the process of removing all the old sole and replacing it with a fresh one. It’s a long, sometimes tedious job that requires patience and a lot of skill. The benefit to a full soling is that it provides a permanent solution to boots that are slowly breaking down. Another benefit is that the boot re-fluffs itself with each step, just like it did when you first bought them.
- A half-sole repair will save you money but the downside is that the boot will wear out quicker, especially because there’s still old sole material in place that can make the boot and your feet slide around.
- A half-sole can also lead to more slipping if not performed well. On a full soling, the new sole is bonded directly onto the boot so it will have a better grip, even on ice. It’s definitely an ideal option for skiers or people who work outside in wet weather conditions.
Have a look at this well-explained video by Robert Powers :
How Many Times Can You Resole Boots?
Sole and heel kits for boots and shoes help you to resole your favorite footwear multiple times, allowing them to live on well beyond their original life.
The number of times you can resole shoes will depend on many factors including how often they are worn, the type of insole used, and the type of outsole selected.
Boots/Shoes designed for resoling typically feature:
- A triple stitched toe box that is more difficult to damage than other areas
- An upper made with tougher material that is more resistant to rips and tears
- A stitch pattern that was designed for longevity with stronger thread and multiple rows of stitching rather than the typical single row found on most footwear
- Resolable outsoles
- Shock absorbing pads under the heel
Pro Tip: People who only wear resolable shoes are able to resoles multiple times, often in excess of 10 years.
For example, if you walk three miles a day in your shoes for five days a week then one pair of soles would equal about 1,825 miles. With consumer testing showing that most outsoles can last at least 1,000 miles before they need to be replaced, you can see how a closed-cell foam provides exceptional value.
Consumers who wear resolable shoes often comment that they are “shocked” at the outsoles ability to last 1,000 miles or more before needing replacement. And the best part is that you only need to replace the outsole, not the entire shoe.
By replacing the outsole you can rest assured that your favorite pair of shoes will be back to supporting your feet for years to come, no matter how many miles (or kilometers) you wear them!
Frequently Asked Questions
Can I resole my own boots?
Yes, you can resole your boots yourself by following our step-by-step instructions. We’ve provided the best way to resole your boots and it will help you save money and time doing it yourself.
Should I replace the worn outsole with something identical?
It is better to ask your cobbler which options you have. For durability and aesthetics, you just cannot beat the re-sole. If the leather has become dried over and cracked there will likely be a need for another pair. When you have a leather sole a half-sole might be a cheaper alternative but it really takes an expert to switch to a new half-sole. These repairs may be more costly than boots themselves but would be worth it if it was a well-loved pair of boots.
Should you replace half or whole sole?
If you have flat feet or pronate heavily then chances are that you’ll be better off replacing half the sole. This way you’ll eliminate half of your arch and keep its curvature intact. If however you have high arches or supinate excessively, then replace the whole sole to get rid of all of it from your shoe.
How long does it take to get boots resoled?
Normally it takes about a week to a month to get boots resoled by a cobbler.
Can I glue my boots together?
Yes, you can if your shoes are of good quality. Glued soles aren’t the best to walk on but they will save you a lot of money. It is best to resole your shoes the right way by following our step-by-step instructions.
What are the benefits of replacing your soles?
The benefits are that you can extend the life of your boots, shoes, or sneakers and they will look brand new again! Our product is affordable for everyone to use. We have provided a great way to help you save money and time doing it yourself.
What should I look for when buying boots with resoling options in mind?
When looking to purchase new footwear the most important thing is to buy something that will last over time. There are many different types of shoes out there so finding one that best suits your needs shouldn’t be tough. Make sure the stitching on the bottom of your shoes is visible. If you can see stitching around the sole it’s more likely that they can be resoled.
The stitch mark on these boots shows that they can easily be resoled! You should always inspect your clothing for worn-out or damaged items before wearing them. Removing these items will not only keep you looking fresh but will also save you from potential embarrassment or injury. This goes for many items such as shoes, shirts, and more.
Final Words
Resoling boots are often cheap and are highly ecologically friendly. Next time you find yourself with worn out soles, don’t throw them out! Follow our simple DIY instructions and save your boots (and your money!) while still getting the same high-quality craftsmanship you deserve. While it may seem like a daunting task to take on, trust me – anyone can do it!
If you need any other advice, send us an email and we would be happy to help in any way that we can!
Good luck and happy resoling 🙂